
this training is recognized by FCCAM for 1.5 training hour ~
Today’s technology has changed so much about our daily lives. It is also having a variety of impacts on our family child care programs. Some of these are planned, some are welcomed, some are real barriers.
Incorporating technology as part of organizing our business is a big jump for many of us. In this training you will be introduced to how Google Drive can be used it to improve efficiency around time with paperwork, while saving money.
Let’s explore the role that Google Drive might play in organizing the paper side of your business. You do not need to have special knowledge to use Google Drive. IFoe myself it was about getting over being afraid I’d lose everything with one click. That hasn’t happened, but I lost a good bit of gathered resources when my harddrive crashed. Having everything saved to the cloud (which Google Drive does) would have saved me a lot of work rebuilding my materials, contracts, handbook, etc.
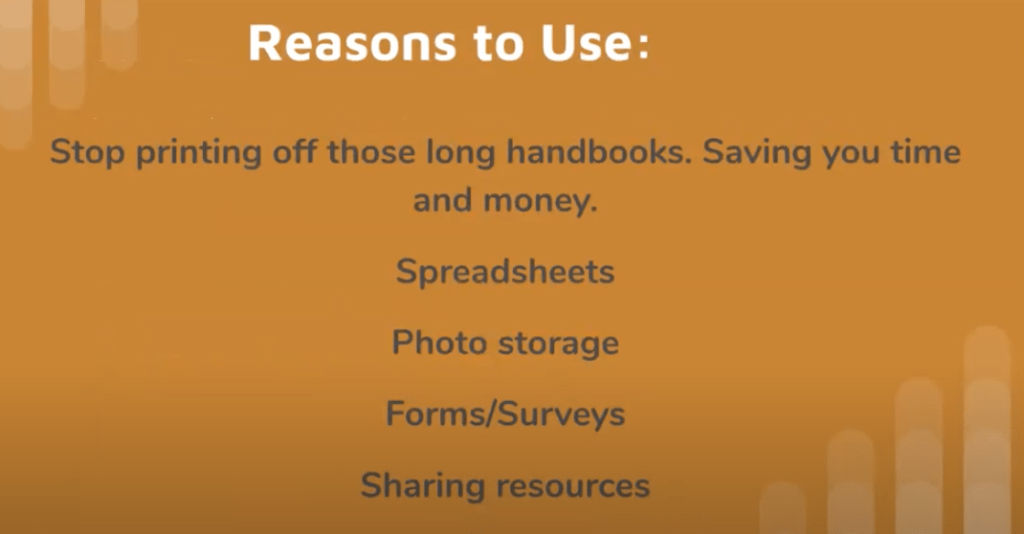
Like many providers, I used my computer like a typewriter to type up newsletters, daily notes, contract forms, and handbook. I then needed to print everything off. I also printed off photos that I added to 3-ring notebook style portfolios. Anything I could write out I was typing out in a word document or spreadsheet. The handbooks were passed out to families that did not decide to use my services or that I decided would not be a good fit. What about those family notifications, daily notes and weekly newsletters that seemed to often to be left behind in cubbies or even on the driveway. I began looking for an alternative that would make use of the available technology to help with organization of paperwork, save time, money and present a strong professional image.
I found that Google Drive provided me with everything I needed. It was FREE with a large amount of storage in the cloud which saved me space on my hard drive and was accessible from anywhere I could connect to my gmail account on any device. I do prefer working to build resources on my laptop over, tablet or phone.
Google Drive is accessible by any smart phone, tablet or computer. You just need your account information. Just about anything I used to do on paper I could do in Google Drive. I could store photos and videos. I could share information through links with any party necessary. There was a ton of help available within my fingertips from Google’s Help Center and on YouTube.
This training is broken out into sections that I hope will make it easier to follow, pull material from and return to in support of both your professional development and your future work with children.
Where To Start with Google Drive
You need a free Gmail account to have your own Google Drive.
I encourage you to open a personal gmail account specifically for your business. This allows you to keep business items separate from personal. Google has had different business/workplace accounts, but I always found personal was enough for my fcc. You do not need to use it for anything other than to access Google Drive if you already have a different email account for your business. You can have as many gmail accounts as you want – all are free.

Once you have your GMail account you are ready to get your Google Drive organized. Google Drive works on any Browser. I’ve used Firefox and Safari, but find I like how Google Chrome works the best.
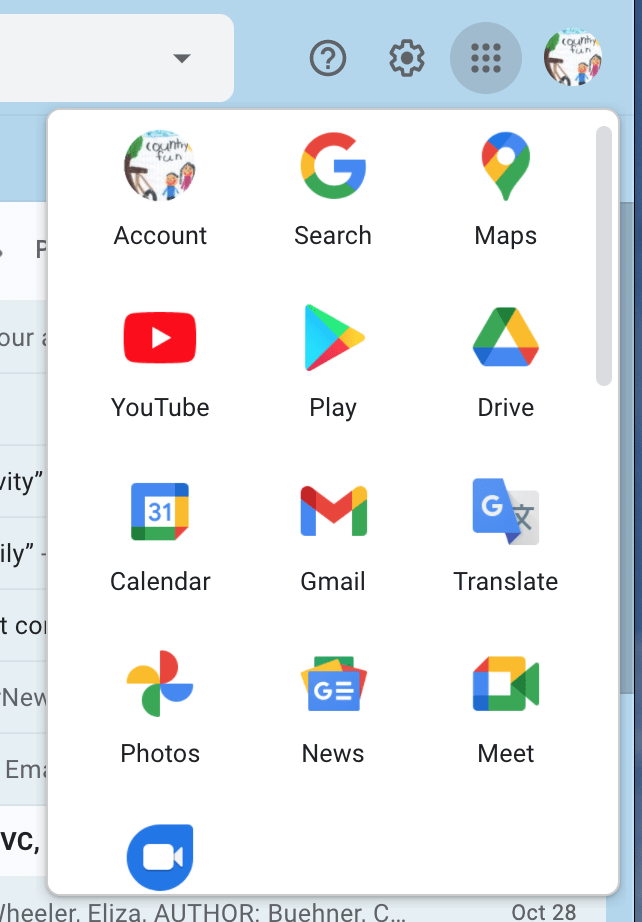
Once in your GMail account you will see an icon and 9 dots in the upper right corner. Clicking on the dots opens a dropdown box where you will see everything that is part of your Google account.
Find the Google Drive icon, click it and you are taken to your Google Drive. If you use Chrome for your browser you can set up apps or tab under bookmarks as a landing page.
Click the Google Drive icon /tab and you go to your Google Drive.
You can also get there by typing “google drive sign in” in the url search box.
Let’s Explore Google Drive
Google Drive is the technology that allowed me to go almost paperless. I still needed paper for items like the paper copies of emergency info on each child just in case we are without electricity and/or cell phone service in an emergency situation and the contact forms required by licensing that I want guardians to sign.
Google Drive allows me to produce, store and maintain/update materials in one place. I make forms for parent surveys; spreadsheets for – attendance, financial records, fire drill log; text documents for handbooks; invoices for families; and folders for eportfolios.
Wouldn’t you love to be able to make small changes to your handbook and not have to print off new copies for all your families each time?
That is just one of the things I love about having my handbook material in Google Drive as a Document. When I make a change all I have to do is send the link to the changed document to my families, so they know, and I maintain 1 signature page where they sign off on their knowledge of the change. No more reprinting that handbook! And no more waiting on or not adding that one little change.
Google Drive also provides storage for photos and videos. You also have a separate Google section that is specific to photos and video. That is where I eventually store all photos and videos for long-term. Photo placement for me has to do with how I’ll be using the photo. For injury reports I place the photo right into the report. For a large group of random photos from the day I’ll place them in Google Photos, as I can access them later when I want to use them. Although videos eat up storage it’s nice to have this option also. I’ve used Vimeo for my video storage for years, but the cost to upgrade Google Drive storage when needed is a better cost point today. I would not upgrade beyond the FREE account storage until needed. It could take you years to use up the available storage. I never used up storage space.
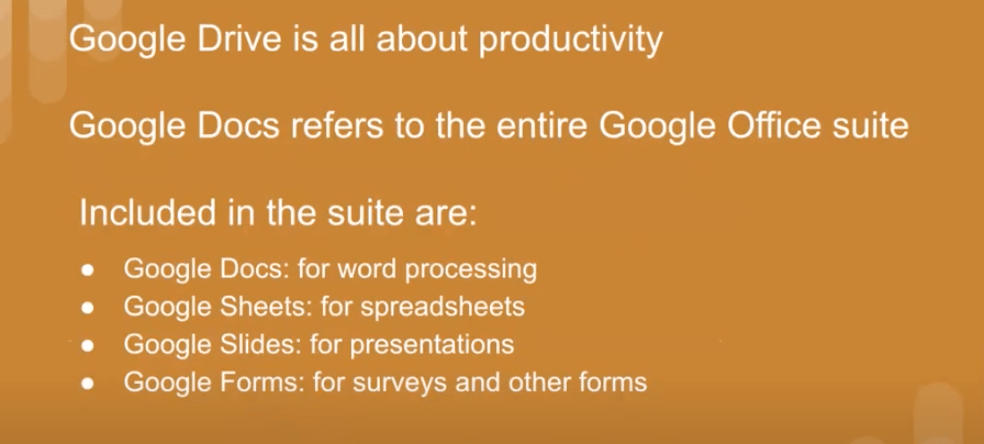
- Google Docs are like other writing documents program like Apple’s Pages, Word.
- Google Drive spreadsheets work very much like Excel, Apple’s Numbers. I like that building them in Google Drive allows me to easily organize them with everything else.
- Google Forms is what I use for surveys and child assessments.
- I don’t use Google Presentations or Drawing very often for my family child care business, but they are there if you want them.
When you start to set up your Drive, I suggest you first go to the settings icon (gear) and click on Convert Uploads, so anything you bring into Google Drive will automatically come in ready for usage. I also clicked for offline usage, but haven’t found I needed that option very often. It doesn’t hurt to have it clicked. You can also change language here (default is English).

For me organization is an important part of running a sustainable small business. I have found that organizing materials is easy using folders in Google Drive. You do not need to save your work as Google Drive continually updates/saves the work to the cloud. Saving to the cloud also allows you to have access from any device that can connect to the internet to the most current version of your work.
You add folders as needed and title them whatever you wish. You can place folders within folders. You can move folders around. You can share, or have private folders. You can import from others or create your own materials. I think of this as my old-fashioned filing cabinet with all its tabbed hanging folders. It takes up way less space and is easier to access.
This is a screen shot of my Google Drive landing page in 2020.
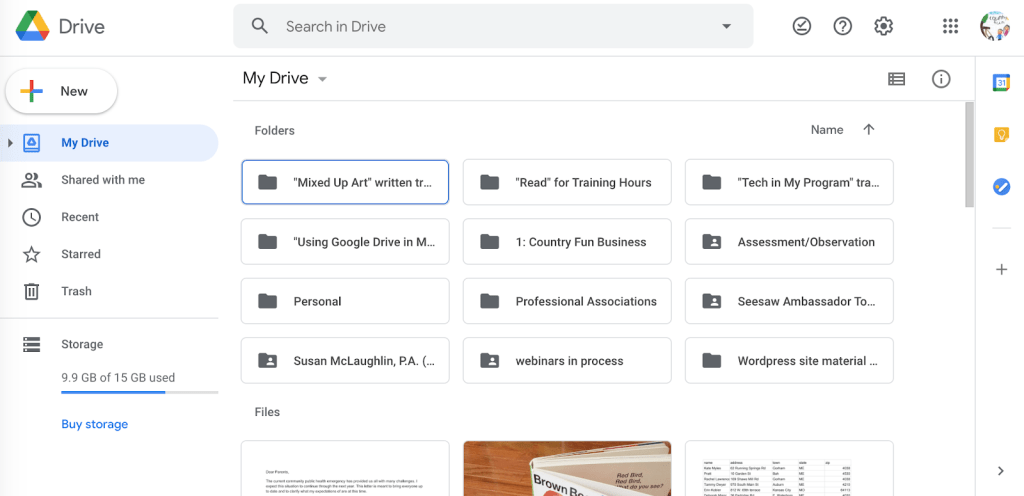
You can see how the landing page is broken out into “Folders” and “Files”. The “Folders” section shows what I think of as my master folders. These folders contain subfolders and files (documents, pdf, photos, videos). The “Files” is the section are everything that is not placed in a folder.
My landing page is set up to view in “gallery”. Google Drive also has a list view. For my visual learner preference gallery works better than “list”. You can switch between these views in the upper right hand corner of your landing page.
I’ll repeat again, that you do not need to save your work as Google Drive continually updates/saves the work to the cloud. Saving to the cloud also allows you to have access from any device that can connect to the internet.
This 15 min. YouTube video provides you with a walk through of Google Drive and how it functions.
Starting with “Folders”
To start my Google Drive I added a number of empty folders that were named by areas of the business. Folders can be renamed at any time. This gave me a place to build new documents, or drag and drop documents I already had written and saved on my hard drive or desktop. You can just bring in files/documents, but I wanted to save time in organizing, so I built my starting folders first. Over time these folders have been added to, renamed or deleted. All easy to do.
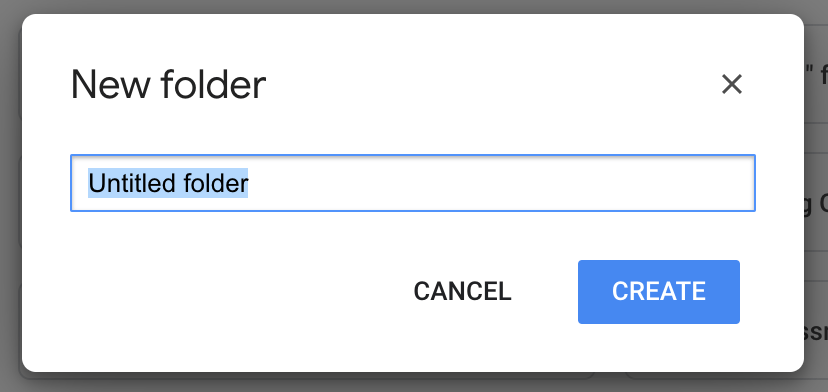
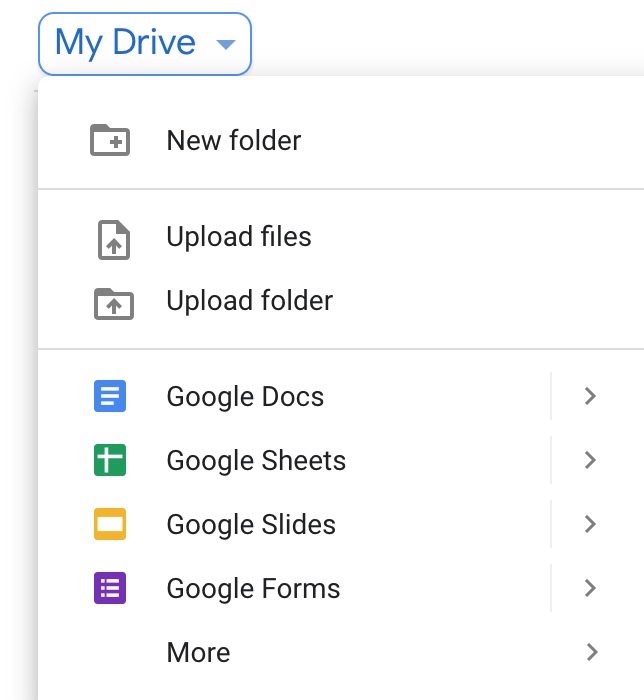
To add a folder click on the new button. You will get a dropdown list of what you can produce. Click on “folder” and a new box will appear asking you to name the folder, click “create”. Once that is done the folder will appear in your Drive.
You also have the option to add folders by clicking on “My Drive” and the same dropdown menu opens there.
I use the side bar “New” button as I don’t like the location of the dropdown menu under “My Drive”. I use the side bar for most of my navigation in Google Drive.
Once you have folders you can start to bring in (“upload”) or generate material to load into them. Folders can sit empty, just waiting. You can also trash folders at any time they are not wanted any more.
If you have materials already built and/or saved on your desktop you can directly upload them to Google Drive. You do not need to rebuilt/retype them. Open up your Google Drive, find the material you want to upload, drag the icon for it onto the open Google Drive window and it automatically uploads.
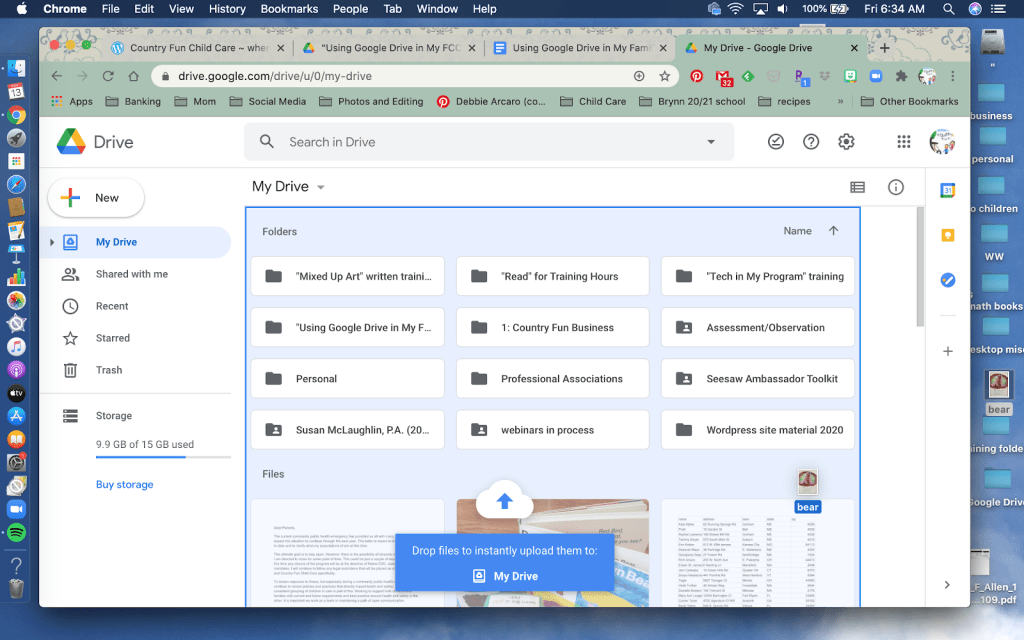
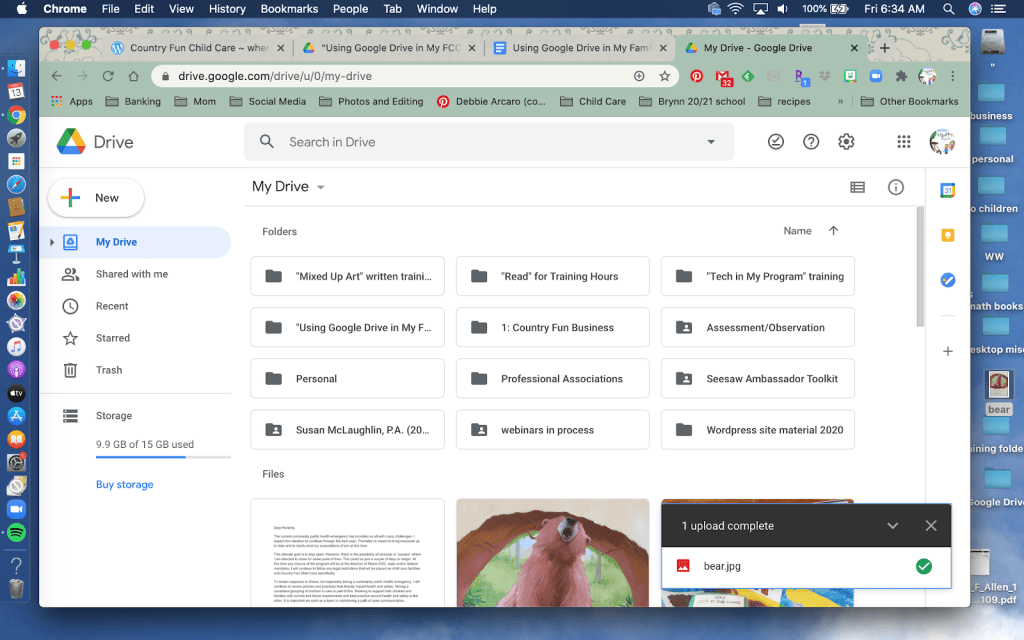
You are shown what is being uploaded and the status.
If you have folders built and you know where you want the material you are uploading, you can drag it right to that folder. When you see the folder highlighted release what you dragged and it will upload to the folder. To save time if I have a lot to add to a specific folder I open that folder and then drag everything directly to it. You can actually drag a full folder from your desktop and Google Drive will grab all of it, so you do not need to add each piece of material separately.
Please remember that I’m not an expert in Google Drive, I’m just sharing how I used it. Like all platforms Google Drive adds updates, but I’ve found the basics have stayed pretty consistent. I have not dug into all the new additions as I haven’t seen a need for them. How I used Google Drive worked for me. Once you start using Google Drive you might wish to explore more of the updates, again making this platform work for you.
I have included tutorial videos from 2019 and 2020 to provide you with the most current information on how Google Drive works in following sections. These might provide you with some alternatives that better suit your organization style. Having knowledge from more expert users as well as my experiences will hopefully allow you to find your way to including Google Drive in your business practices.
Google Documents
Google Documents functions a lot like Microsoft Word, or Apple Pages.
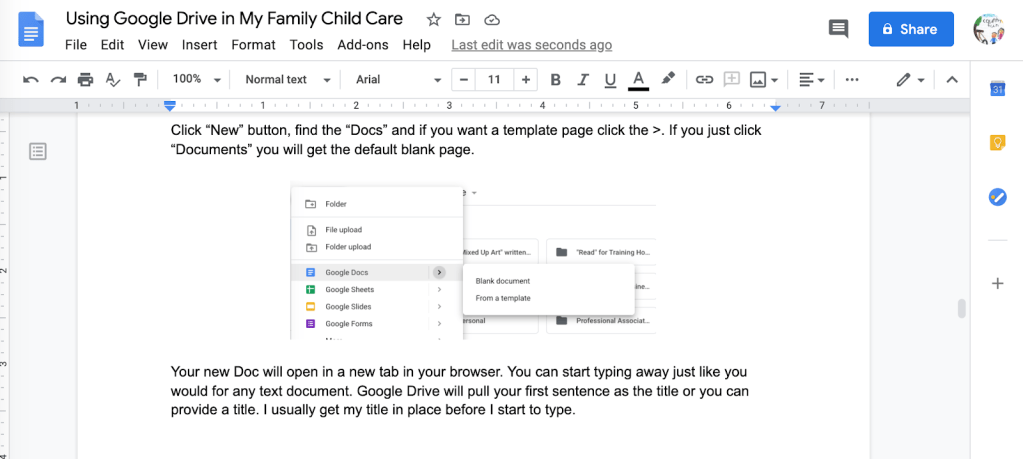
Click the “New” button, find “Google Docs” and if you want a template page click the >. If you just click the “Google Docs” you will get the default blank page. I usually work directly from “Google Docs”, as I usually work from a blank page, but it’s good to check out what templates are available.

Your new document will open in a new tab in your browser. You can start typing away just like you would for any text document/word processor. Google Drive will pull your first sentence as the default title or you can provide a title. I usually get my title in place before I start to type.
Here’s what a document looks like in use:
In the left upper corner, you will see a blue document icon followed by the title, the folder location and if the doc is shared or locked (private).
Under that you have access to all the regular word processor/text document tools.
This short 9 min. video moves along quickly, providing a good overview of what you can do in building a document. I haven’t used half of what he explains, but you can see what is possible.
For a fuller look at Google Drive / Google Documents check out this 29 min video.
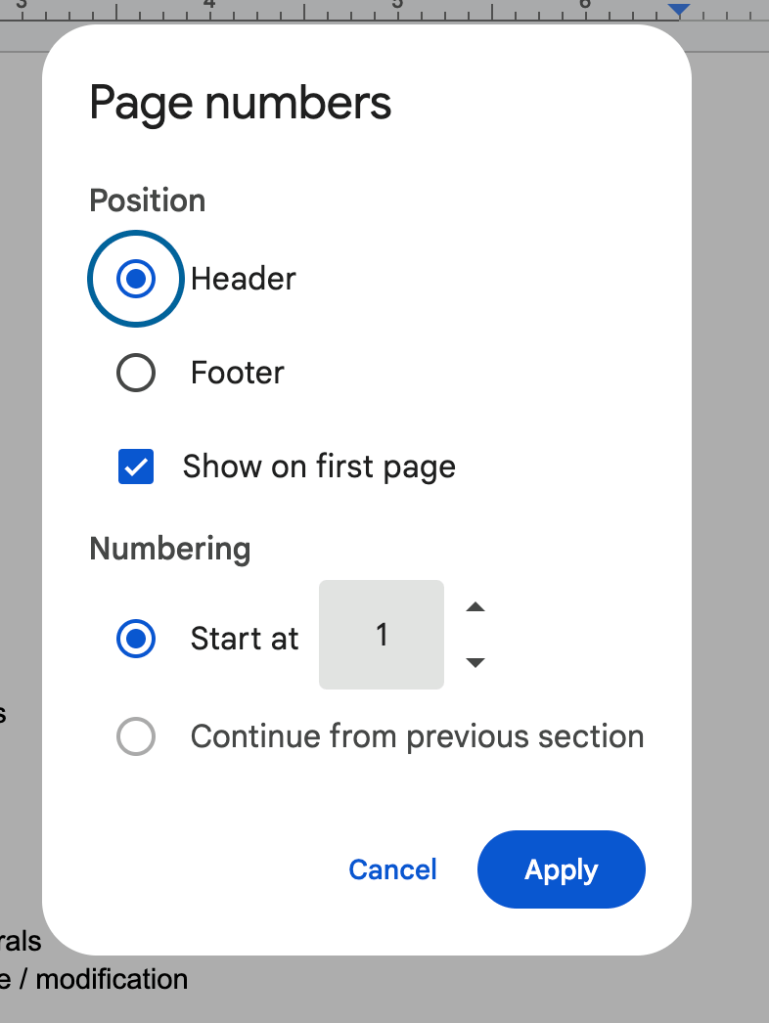
Adding page numbers to a google doc is pretty easy and makes it easier for notification for parents and documentation for Rising Stars/QRIS. You can currently add through the doc. menu under “Insert” / drop down find “page number” / options show. I like the number at the bottom corner of the page so I usually chose that image. You can also chose “more options”.
Using Google Documents
I used Google Documents for the posts on my child care business website. I built everything in google documents, so I could find it in My Drive at any time. I could easily change it out in Drive and then copy and paste it into my website.
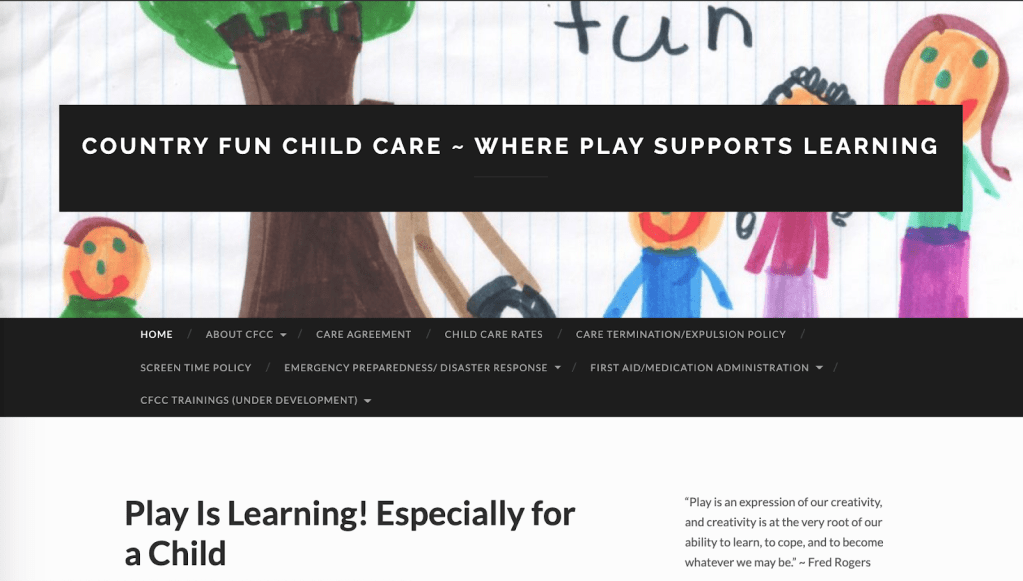
My website provided information for my families and also potential clients. It had my contract and handbook, emergency preparedness plan, work calendar for the year, and philosophy. Everything I needed to meet licensing and QRIS could be accessed there. Without a website, I would provide families with the appropriate url link to view the material I wanted to share with them. Being able to share the url link means I wasn’t printing off my many paged handbook or emergency preparedness plan. I was down to just printing off those contract pages I needed signed.
I also used documents for my injury reports. I had a master copy that I made a copy of as needed and added in the necessary information. I could also add in photos of injury and even location. I could also add a future photo to show healing if needed.
I used documents for daily notices and invoices if requested by families. Again set up a master copy and then duplicate and complete as needed. I could add in tables which could be quickly filled in with info.
I composed weekly newsletters in documents.
I built individual eportfolios folders for the children in care. Documents were easy to add to these eportfolios folders. This kept them private and shared only with the family.
I used documents to build assessments. Master copy and duplicate as needed.
Everything you wrote out on paper could be typed into a document, saved, copied, duplicated, shared, edited…….
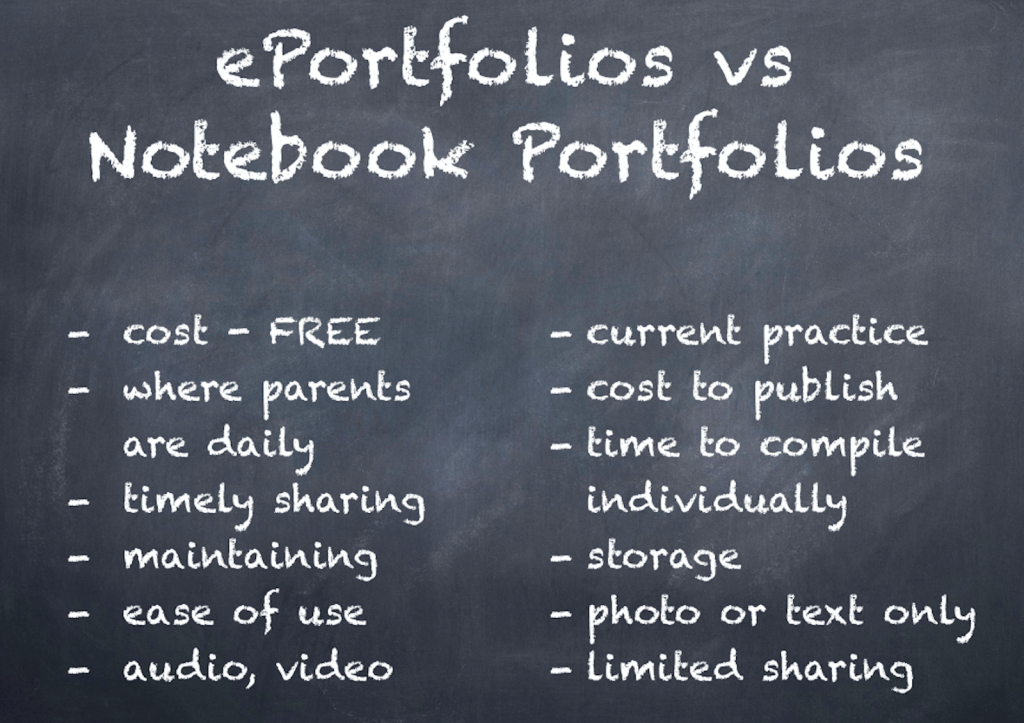
Child Portfolios
I made my first eportfolios by adding documents around assessments, development milestones, MELDS/Early Learning Guidelines. These documents included photos and links to videos I also had in Google Drive. This was equal to the old 3-ring binder paper portfolios I maintained for each child.
I took time to list out the Maine Early Learning Developmental Guidelines and was able to copy that list and then add notes with a different color font for assessment. You can find a newer version which is now available as part of Maine’s Learning Standards resources for parents and educators resource .
Having the ability to continually add to the eportfolio, I didn’t just have a year long portfolio, but a portfolio that showed the developmental story over all the years a child was in my care.
Families could access and even share with any one they wanted. I had families sharing their folder with their medical professional when they had normal child developmental check-ups. Others shared with special services professionals.
This eportfolio still takes time, but for me it was less than the paper version. It was also FREE. Families had 24/7 access. One weak point for me was, I wasn’t sure if or when families were accessing the portfolio. I found I was continually checking in with them. (While the eportfolio in Google Drive was a positive step forward for me I wanted a platform where I knew who saw what and when. That meant that while I continued with the eportfolios in Google Drive I was on the search for an alternative. I found one in Seesaw, which is where moved my eportfolios.)
I needed the portfolio as part of my QRIS level, but I also believed then and still do now, that there is value in families having ongoing access to their child’s portfolio. This access strengthen our daily communications. It’s also presented my work in a professional way.
Google Sheets
Click the “New” button, find “Google Sheets” and if you want a template page click the >. If you just click the “Google Sheets” you will get the default blank page. You will see a green sheet icon.
Google Sheets looks like most other spreadsheets (Excel or Numbers) and operates pretty much the same.
Sheets is an area I found I needed more concentrated time to get a bit more comfortable with. I never got a handle on time saving spreadsheet shortcuts, but that’s ok as I found using these spreadsheets still saved me time.
As a small business owner I found record keeping organization to be an ongoing. It was also a way to pay myself. After listening to and reading articles of Tom Copeland around the importance and value of record keeping I have to agree. Good records = money.
In general I found the basic formation of a spreadsheet worked fine for keeping attendance, family financial records, and fire drills. I also used sheets for my tax records.
Here’s a 15 min. video introduction to sheets.
Here’s a 1hr video for beginners in Google Sheets, that does a much deeper/fuller job of explaining how sheets works. I still refer back to training like this when I hit a rough spot.
Here’s a 19 min video that shows you how to take your google sheet to an excel sheet. I didn’t find I needeed to do that very often.
Google Forms
Some will see “Form” listed in the sidebar, but others will need to click on the MORE in the drop down under “New” to get to Google Forms. The Form icon is purple.
I used Google Forms for requirements to maintain QRIS. I developed an annual family survey where families could complete a survey about my child care program. (I developed the survey after taking a Strengthening Families training.) This form of survey allowed families to complete it quickly online and I had a spreadsheet of the responses that was timestamped. I had this survey linked on my business website (annually reminded families about completing it) and could also provide url to any individual as requested. I could also send it along when children left care.
Another usage is for an assessment checklist. I built this from the assessment sheets that I used with my preschoolers. I put copies of the assessment sheets into clear notebook sleeves that children could mark up with dry erases markers or crayons, which saved printing. Having the checklist in this online form allowed me to quickly mark while children completed assessment. I then got a timestamped spreadsheet which not only allowed me to see individual development, but also looking at the program as a wole to see if I was missing areas for instruction.
I also built a form to handle the yearly self assessment I needed to complete about my program. I could then build professional and program goals from this assessment. Again I did a response spreadsheet with timestamp and I could compare results over the years. My self assessment actually had multiple forms to easily break out areas:
- Interactions, Curriculum, Physical Environment, and Health, Safety & Nutrition
- Different Ways Family Child Care Providers Can Facilitate Friendships and Mutual Support
- Different Ways Family Child Care Providers Can Strengthen Parenting
Here’s an 18 min. Video on Google Forms
Using Google Drive I used way less paper and had lower ink costs for printing off handbooks, portfolios and weekly newsletters. It allowed me to arrange a structure of organization that worked for me, yet I could change as I learned something new, or had a new licensing requirement, thus saving time. Google Drive was a win for me for years. Lower cost, better use of time = good business practices = sustainable business.
I hope this training has answered some of your questions around the benefits you might find in using Google Drive within your family child care business. I hope that it has gotten you thinking that technology can be a real support and it’s very doable. It does take time to get started, but that’s part of starting and growing a sustainable small business. You opened a family child care, you’re a small business owner now.
Don’t forget you will need to complete the Reflection Activity Form (found below) before your certificate of training can be sent to you.
Reflection Activity: Submit information on how you have begun using “Drive” as part of your business and/or work with children.
Example:
Write a brief paragraph about something you have been inspired to set up in your “Drive” from the material and resources provided through this webinar
a url link for a sign/out spreadsheet
Share resource you downloaded into a folder
Share screenshot of your “Drive” home page showing folders or files you are setting up and organizing
